
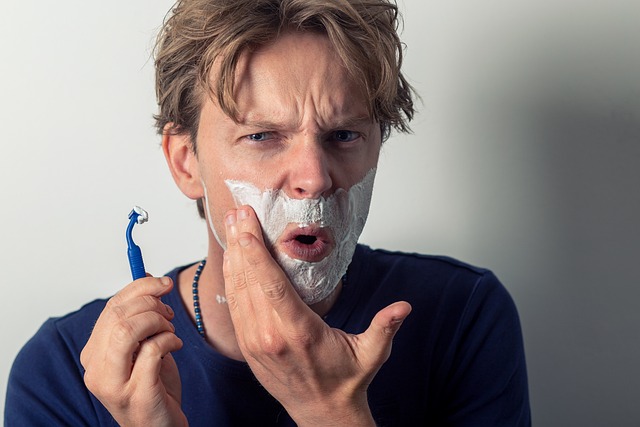
Have you ever been in a rush to get ready and end up nicking yourself while shaving? It happens to most of us. What’s worse is when the bleeding doesn’t stop and you’re left with a pesky cut that just won’t go away. Fear not, we’ve got you covered. In this guide, we’ll show you how to stop bleeding from shaving and get you back to looking your best.
Step 1: Rinse With Cold Water
When you first notice bleeding from a shaving cut, the immediate step is to rinse the affected area with cold water. This is an important step as it helps to constrict blood vessels, slow down bleeding, and clean the wound, preventing infection. The cold water helps to constrict blood vessels, reducing blood flow to the affected area. This, in turn, reduces the amount of blood that is lost and helps to slow down the bleeding. The cold water also helps to numb the area, reducing pain and discomfort.
Additionally, rinsing the affected area with cold water helps to clean the wound and remove any dirt or debris that may have entered the cut. This helps to prevent infection and promote healing. When rinsing with cold water, hold the affected area under the water for a few minutes until the bleeding has slowed down or stopped. It’s important to avoid using hot water as this can increase blood flow and make bleeding worse.
Step 2: Apply Pressure
After rinsing with cold water, the next step is to apply pressure to the affected area. This is an important step as it helps to stop the bleeding by allowing a blood clot to form. To apply pressure, use a clean and dry cloth or tissue and gently press it on the cut. Hold it there for a few minutes, allowing the pressure to help the blood clot.
Be sure to avoid touching or removing the cloth or tissue to check if the bleeding has stopped, as this can disrupt the clot and cause bleeding to resume. If the bleeding is severe or does not stop after applying pressure, seek medical attention.
Step 3: Use a Styptic Pencil
If the bleeding persists, a styptic pencil can be used to stop the bleeding. A styptic pencil contains aluminum sulfate, which helps to constrict blood vessels and promote clotting. To use a styptic pencil, wet the tip with cold water and apply it directly to the affected area. Hold the pencil on the cut for a few seconds until the bleeding stops. Be careful not to press too hard or rub the pencil on the cut, as this can cause further irritation. It’s important to note that styptic pencils can be harsh on the skin and should only be used as a last resort if bleeding persists.
Step 4: Apply an Antiseptic
After stopping the bleeding, it’s important to apply an antiseptic to the affected area to prevent infection. This is an important step as a shaving cut can introduce bacteria into the skin, which can lead to infection. To apply the antiseptic, use a cotton ball or swab and apply it directly to the wound. Make sure to cover the entire cut and allow the antiseptic to dry before moving on to the next step.
There are several antiseptics that can be used, including hydrogen peroxide, rubbing alcohol, or an antiseptic cream. It’s important to choose an antiseptic that is safe for use on the skin and avoid using harsh chemicals that can further irritate the skin.
Step 5: Apply a Bandage
If the cut is deep or large, it’s best to cover it with a bandage to protect it from further damage and promote healing. This is an important step as a bandage helps to keep the cut clean and prevents bacteria from entering the wound. Choose a bandage that is the appropriate size for the cut and stick it on the affected area. Make sure to change the bandage regularly, at least once a day, or whenever it becomes wet or dirty. This helps to prevent infection and promote healing.
It’s important to note that some people may be allergic to the adhesive used in certain types of bandages. If you experience itching, redness, or swelling, it’s best to switch to a hypoallergenic bandage.
Step 6: Prevent Future Cuts
Once the bleeding has been stopped and the wound has been covered, it’s important to take steps to prevent future cuts. Here are some tips to follow:
- Use a sharp razor: A dull razor is more likely to cause cuts and nicks. Make sure to replace your razor regularly, at least once a week, or whenever it starts to feel dull.
- Shave in the direction of hair growth: Shaving against the grain can cause irritation and cuts. Make sure to shave in the direction of hair growth to minimize the risk of cuts.
- Use shaving cream or gel: A good quality shaving cream or gel helps to lubricate the skin, making it easier to shave without causing cuts.
- Take your time: Rushing through your shave increases the likelihood of cuts. Take your time and be gentle when shaving.
- Moisturize after shaving: Using a good quality moisturizer after shaving helps to soothe the skin and prevent irritation.
By following these tips, you can reduce the risk of future cuts and keep your skin healthy and smooth.
Bottom Line
In the end, shaving shouldn’t be a pain – it should be a pleasure. By following these simple steps, you can quickly stop the bleeding and get back to your day with a smooth and clean shave. Remember to take your time, use a sharp razor, and always shave in the direction of hair growth. Don’t forget to use a good quality shaving cream or gel and moisturize your skin afterward. With these tips in mind, you’ll be on your way to a perfect shave every time. So, whether you’re rushing out the door or taking your time, you can rest assured that you know how to stop bleeding from shaving.
For more informative articles, check out the rest of our site!